Step 2. Upload the image into your Media Library

Click Start Writing from any prompt to start your story. From the Add Story page, click Add Media:

Add Media

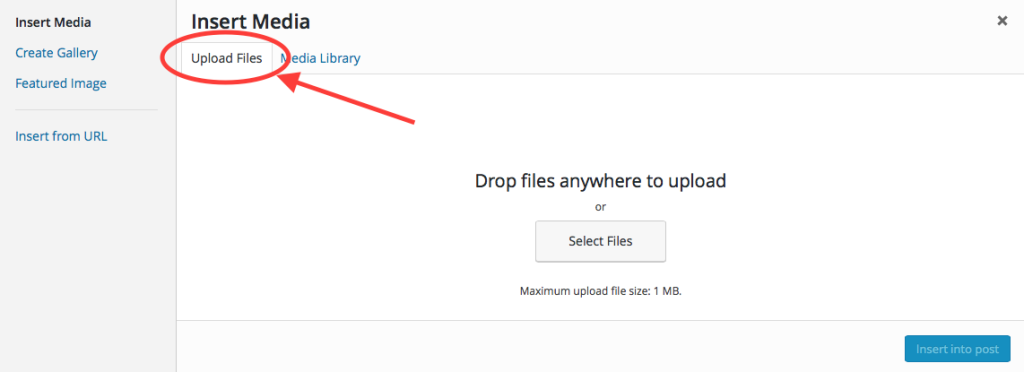
This will take you to your Media Library. Click Upload Files.

Upload Files

Either drag or drop an image from your computer into this window, or click Select Files, navigate through your folders, and select the image you want.

If there are other images you want to use in your story, click Upload Files again and repeat the process. Now they are in your Media Library, ready to be added to a story.

Insert Media

Click the X in the upper right corner to go back to the Add Story page.

Continue with:

Step 3. Insert the image into your story.

Or go back to:

Step 1. Get the photo onto your computer.

Step 3. Insert the image into your story

Once an image is on your computer, there are two ways to include it in your story.

3a. Insert the image as your featured image.

Your featured image is meant to give readers a clue to what the story is about. This image will appear: 1) at the top of the story; 2) on the home page when that prompt is current; and 3) as a thumbnail in a list of stories.

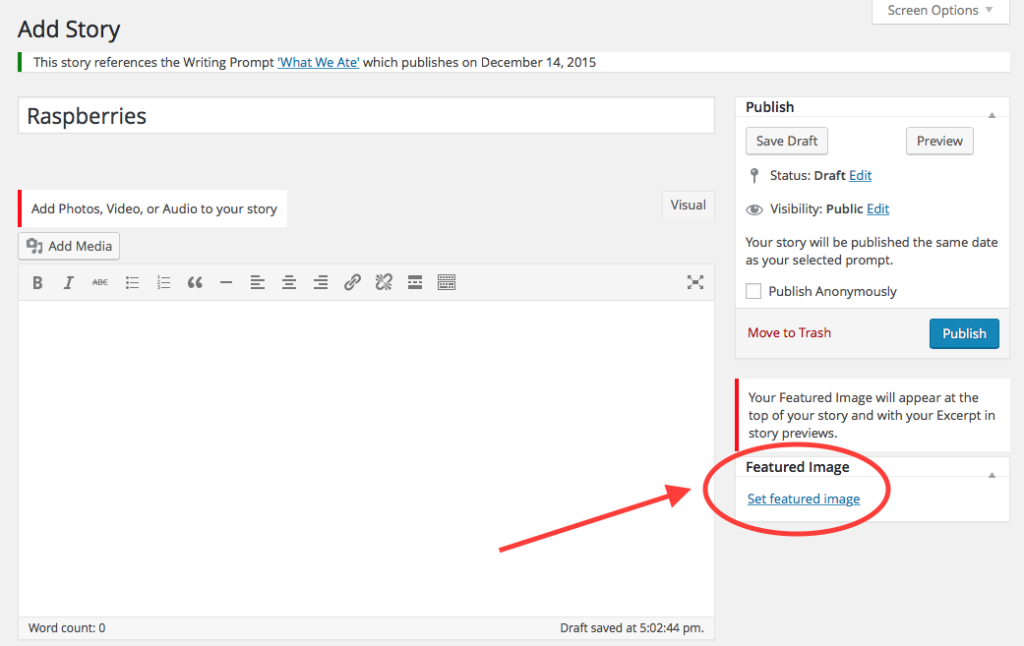
From the Add Story page, click Set featured image to go back to your Media Library, where you can select an image you’ve already uploaded.
Set Featured Image

(If you haven’t uploaded your image yet, you can upload or drag and drop it from your computer as explained in step 2.)
Featured Image

Set Featured Image 2

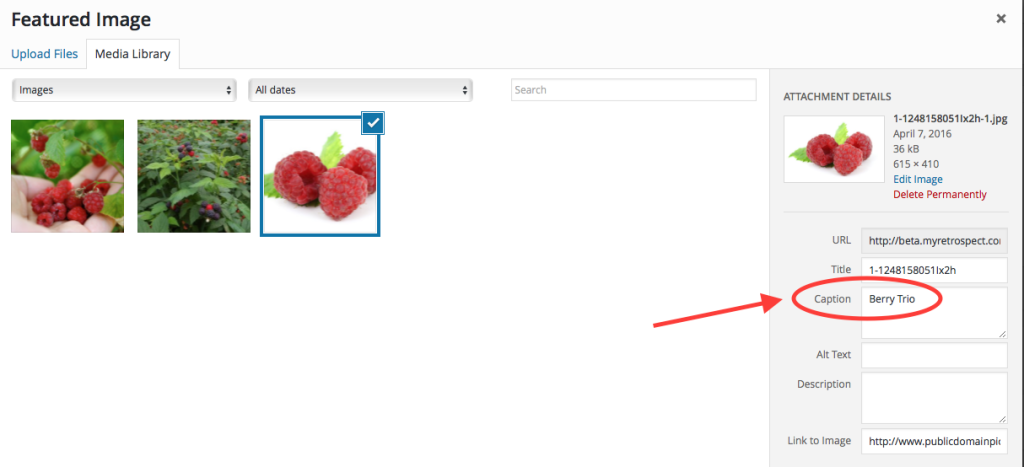
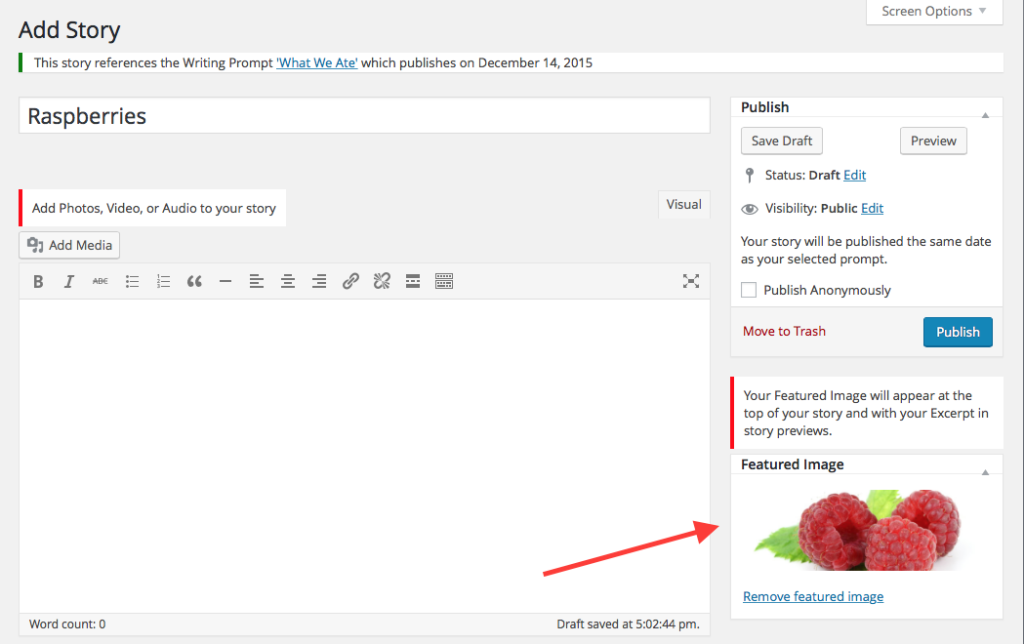
Click the featured image you want (a checkmark will appear). If you wish, enter a caption for the image in the Attachment Details section on the right. Then click Set featured image at the bottom right. You’ll see the image under Featured Image on the right side of the Add Story page.
Featured Image Set

If you don’t set a featured image, but your story contains other images, Retrospect will select the first one to use on the home page and as a thumbnail.

3b. Embed the image within your story.

To embed images within your story, put your cursor where you want to insert an image and click Add Media.
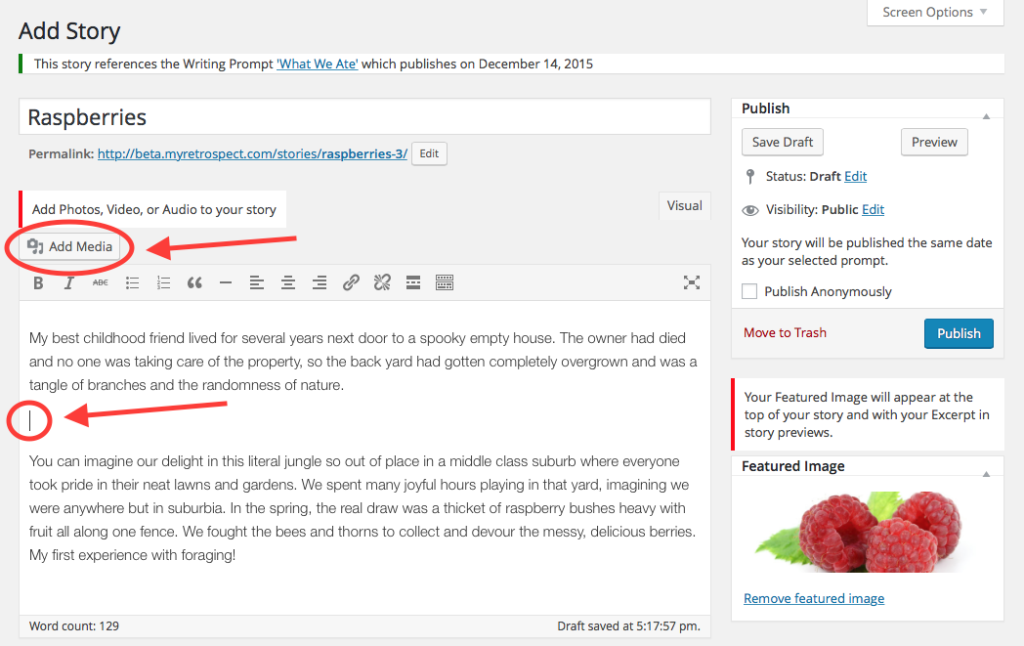
Embed Images

Again you’ll see your Media Library, where you can click to select an image or upload a new one.
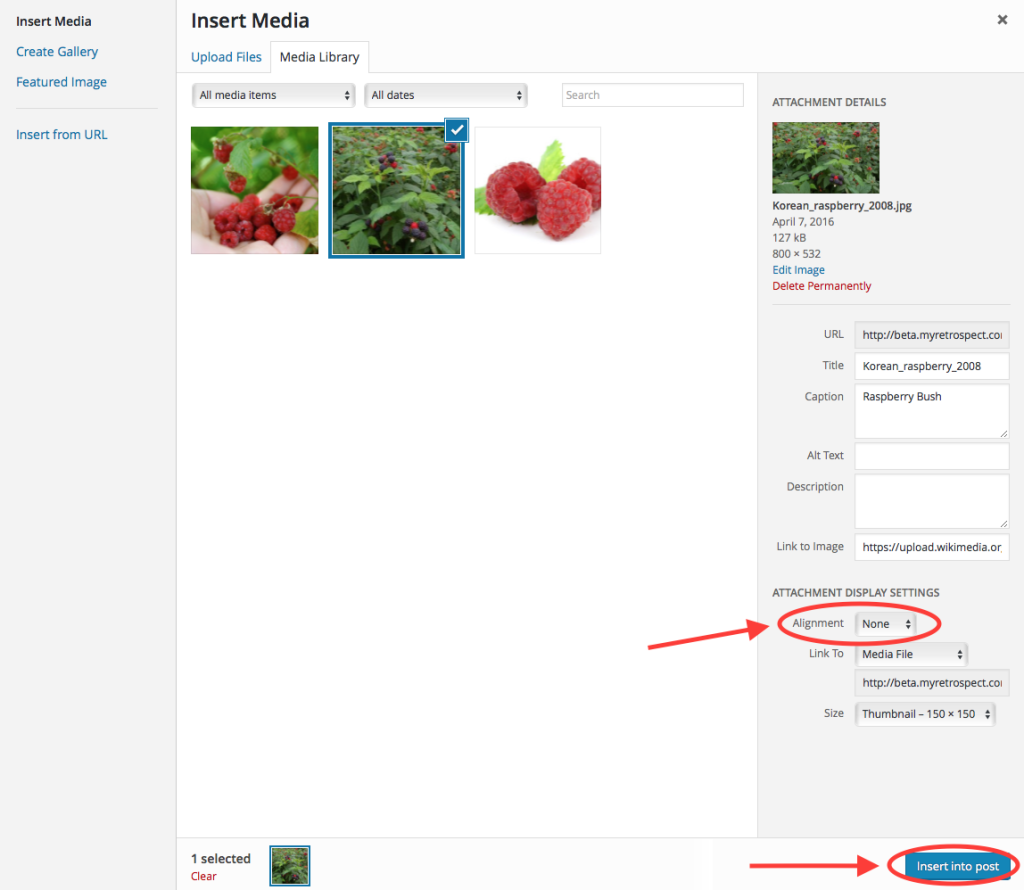
Insert media 2

Once you select your image (a checkmark will appear), Attachment Details will appear on the right.

By default, your image will appear left-aligned in your story, occupying its own vertical space. You can also flow text around it if you wish. Below the caption field, under Attachment Display Settings, set Alignment to Left or Right or Center and Size to Medium or Thumbnail.

When you’re done with Attachment Details, click Insert Into Post at the bottom right. Back on the Add Story page, your picture will appear in the main text box, wherever the cursor was. You can drag it elsewhere if you wish. Lather, rinse, repeat.
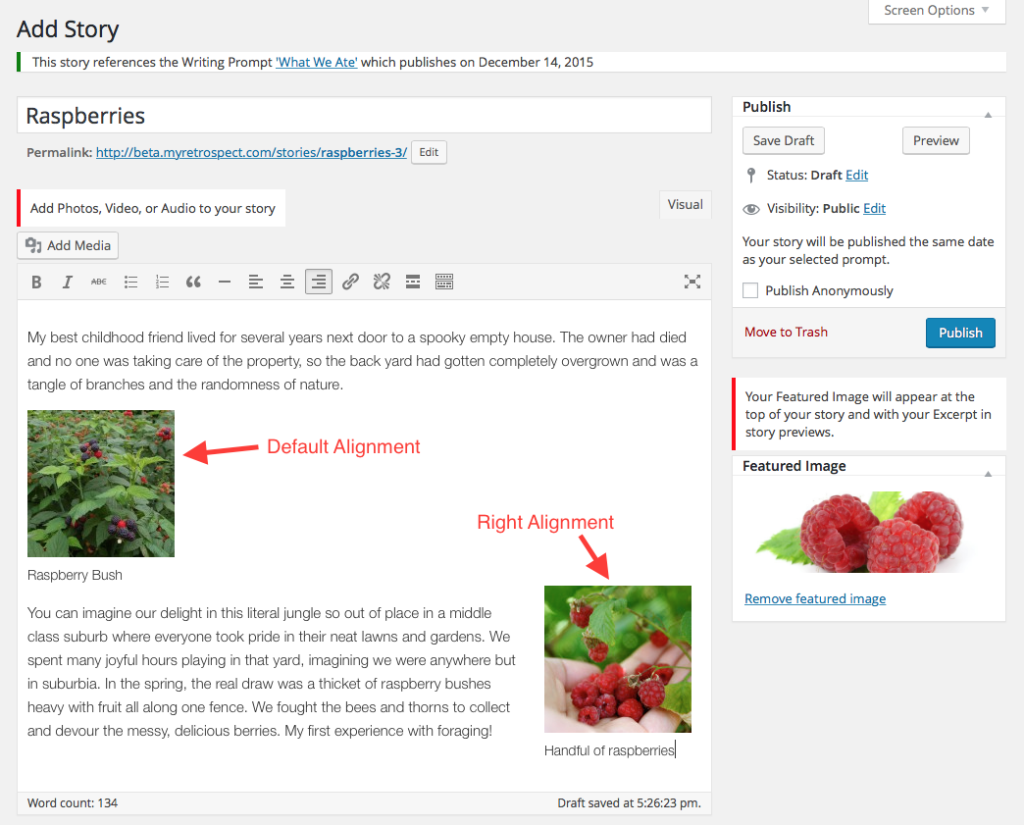
Image Placement

Play around with image placement and alignment until you’re happy with it.


Preview your story

Before publishing your story, you can always click Preview to see how it will appear in Retrospect.
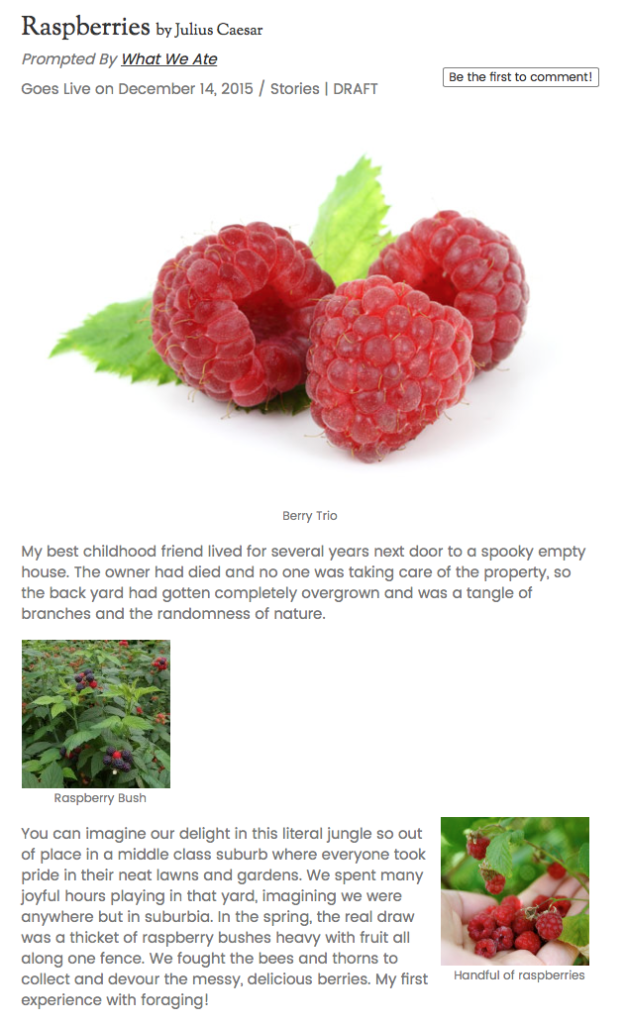
Preview


Go back to:

Step 1. Get the photo onto your computer.

Step 2. Upload the image into your Media Library.
Messaging Another User

After reading a story, you can add a positive comment in the box below it. Once approved by the author, it will be visible to anyone who reads that story. But suppose you want to respond privately. How do you send a private message to another user?

Just click their name wherever you see it. From their list of stories, click the link at the top to view their profile. (You can also Search for them; remember to select Search Members.)

Click Private Message. Enter your subject line and message, and click Send Message to send it.

Searching for Members

The Search box in the top right corner of the Retrospect site searches only for stories that include your search term. So if you search for a member’s name, it might come up empty.

With the search results, however, you will see additional search options. Click Search Members and try your search again.

Featured Excerpts

When you write or edit a story, just below the text, you can enter an excerpt. It can be a quote from your story, a short summary, or any other text you choose. The excerpt will appear as a summary or teaser for your story in a list of stories, such as appears on the home page. It will also appear as a “pull quote” in the body of your story. We recommend selecting an excerpt that will entice readers to click through to read your story.

Screen Shot 2016-05-03 at 5.32.14 PM

If you don’t select an excerpt, Retrospect will simply use the first few lines of your story instead.

How to Find New Stories on Past Prompts

New stories on this week’s prompt appear on the home page. Below them, you’ll see a rotating selection of stories on last week’s prompt, and then a rotating selection of other recent stories.

To find the latest stories added to Retrospect, no matter what the prompt, just click Read Stories on the top menu. You’ll see a list of all stories, starting with the most recent.

If you want to read stories on a particular past prompt, click Read Stories > Past Prompts and choose the prompt you want. Again, by default, the stories you see will be arranged chronologically, starting with the most recent. You can filter or sort those stories any way you like.

To Share or Not to Share?

Screen Shot 2016-05-03 at 5.08.33 PM


When you write or edit a story, you can decide how to share it using the Publish box in the upper right corner. The Visibility control lets you share stories with the entire community (Public, the default), but by clicking Edit, you can also choose to password protect it (and give the password—for now—to to those other beta testers you select) or keep it private. You can also click Publish Anonymously to remove your byline from the story.

Screen Shot 2016-05-03 at 5.09.09 PM

Responding to Comments

Comments don’t appear automatically on the site. We leave it to you, the story author, to moderate them. This helps us exclude spam, trolling, and abusive material, as specified in our Community Guidelines.

When someone comments on one of your stories, you will (with rare exceptions) receive a moderation email. It will quote the comment and offer links to:

  • Approve the comment
  • Trash it (discard it)
  • Spam it (discard it and report it as spam)

Clicking any of these links will take take you to the Comment Moderation page.

Alternatively, when you sign into Retrospect, you’ll see a comment icon and a number in the top right corner, next to your name. If the number is more than zero, you have comments waiting. Click the icon to go to the Comment Moderation page.

The choice is yours, but please moderate comments promptly.

You can also turn off comments entirely for any story you choose. On the Add or Edit Story page, scroll down to the Discussion section and uncheck Allow Comments.

 Screen Shot 2016-05-04 at 11.01.42 AM

Changing Story Prompts

Occasionally, you might start a story in response to a particular prompt, but it actually turns out to be about something else. You can change the prompt assigned to a story on the Add or Edit Story page. Scroll down to the Assigned Prompt field, pull down the menu, and choose a new prompt. Or choose My Own Topic if there’s no prompt (yet) that fits your story.

Screen Shot 2016-05-03 at 5.43.53 PM


Screen Shot 2016-05-03 at 5.43.02 PM


You can also suggest new prompts using the Contact link in the lower right corner of any page. Choose Story Prompt Idea from the Topic menu.